To care for your equipment effectively, you must perform daily visual inspections, clean hand tool chucks to prevent carbon buildup, and ensure cooling vents remain free of metallic dust.
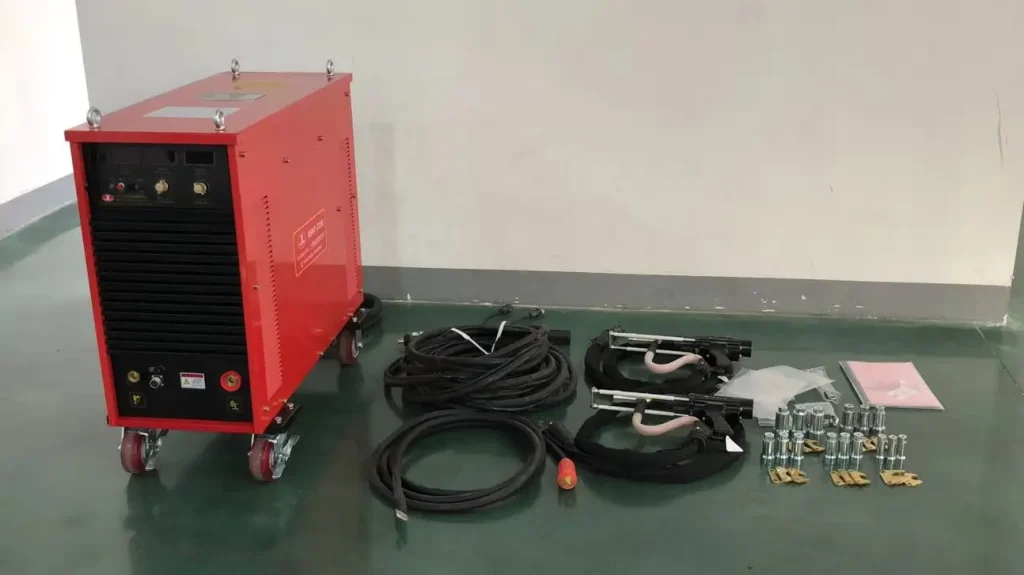
Imagine your production line halting mid-shift because your welder suddenly loses its arc or blows an internal circuit. A single day of downtime doesn’t just cost money; it ruins project timelines, frustrates high-value clients, and compromises the structural integrity of your welds. It is a stressful scenario that every operator wants to avoid. Fortunately, implementing a rigorous stud welding machine maintenance routine is the secret to extending tool life and ensuring every fusion is flawless.
Why prioritize daily stud welding machine maintenance?
Daily stud welding machine maintenance is your first line of defense against unexpected technical failures on the job site. By checking your setup every morning, you identify loose connections before they cause erratic power delivery. This simple habit maintains stable voltage output and reduces the risk of weld porosity.
Identifying early faults
- Check for visible cable fraying.
- Verify all ground clamps are tight.
- Wipe down the exterior casing.
The best part? By catching minor issues now, you avoid the “emergency repair” scenarios that stop production. Regular inspections ensure your gear meets international quality standards during every shift.
Key Takeaway: Consistent daily checks prevent minor debris buildup from evolving into catastrophic electrical failures.
| Frequency | Action Item | Benefit |
|---|---|---|
| Morning | Visual Connection Check | Arc Stability |
| Morning | External Dust Wipe | Cooling Efficiency |
| End of Shift | Accessory Organization | Tool Longevity |
How to clean for stud welding machine maintenance?
Effective cleaning for stud welding machine maintenance starts with removing metallic dust that can bridge internal circuits. You should always use non-conductive tools and dry air to clear the sensitive internal components. Moisture must be avoided at all costs to prevent short circuits.
Removing metallic dust
- Use high-pressure compressed air canisters.
- Apply dry, lint-free microfiber cloths.
- Utilize soft-bristled non-static brushes.
Think about this for a second. A dust-free environment inside your power source prevents the overheating issues that lead to component burnout. Always ensure the unit is unplugged before you begin any internal cleaning process.
Key Takeaway: Maintaining a clean power source operates at lower temperatures, extending the life of internal capacitors.
| Tool | Usage | Component |
|---|---|---|
| Compressed Air | Vents and Fins | Cooling System |
| Microfiber | External Panels | Display/Case |
| Soft Brush | Circuit Boards | Power Modules |
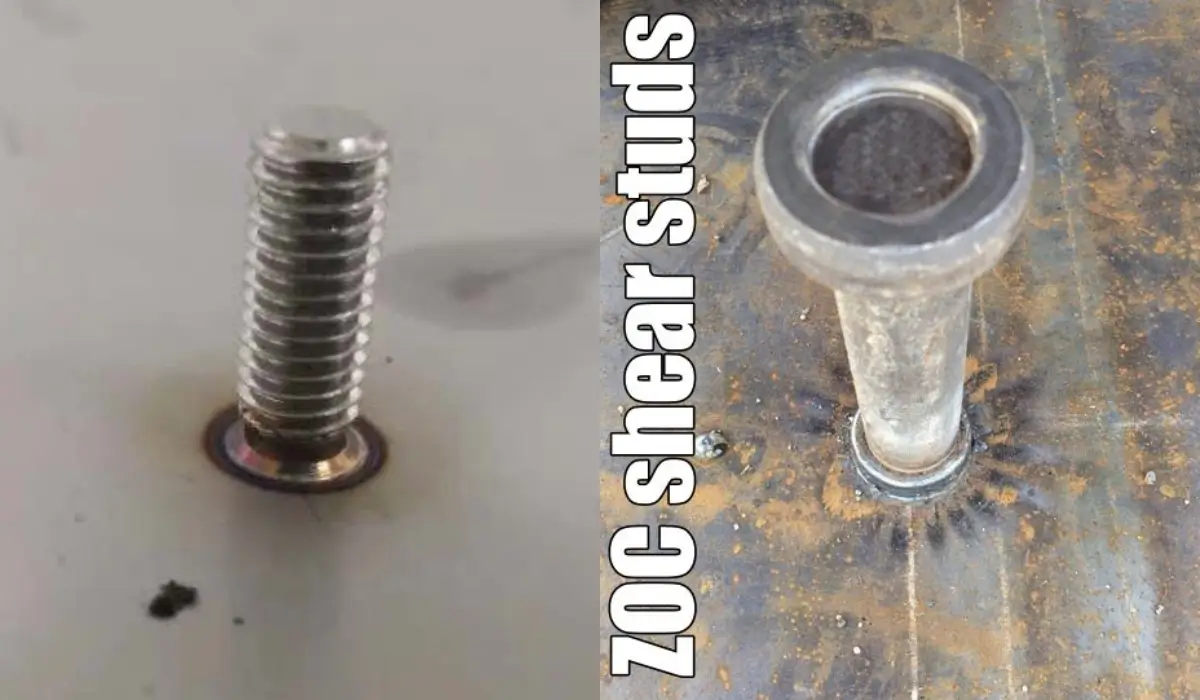
What hand tool care helps stud welding machine maintenance?
Specialized hand tool care is a cornerstone of stud welding machine maintenance because the gun is where the fusion occurs. You must regularly inspect the internal lifting mechanism and the chuck for carbon deposits. Keeping these parts clean ensures the “lift and plunge” cycle remains precise.
Maintaining the welding gun
- Scrape weld spatter from the chuck.
- Verify internal lift height settings.
- Ensure the trigger operates smoothly.
You might be wondering. A dirty chuck leads to poor electrical contact and “arcing out” during the weld cycle. Proper maintenance of the stud welding gun prevents inconsistent penetration and brittle joints.
Key Takeaway: Keeping your welding gun in top condition ensures every stud is placed with professional precision.
| Gun Part | Action | Impact |
|---|---|---|
| Chuck | Remove Carbon | Better Current Flow |
| Spring | Check Tension | Accurate Plunge |
| Legs | Align Parallel | Vertical Placement |
How do internal checks aid stud welding machine maintenance?
Internal component audits are vital for stud welding machine maintenance because they protect the heart of the system. You should look for leaking or bulging capacitors, which indicate imminent failure of the power bank. Tightening internal bus bars ensures that high-current loads are handled safely.
Inspecting capacitor banks
- Look for signs of heat discoloration.
- Verify all internal fasteners are tight.
- Blow out dust from the main transformer.
And it gets even better. By identifying failing capacitors early, you can replace them before they damage the main control board. This proactive approach saves thousands in repair costs over the machine’s lifespan.
Key Takeaway: Regular internal audits protect your investment from the heat and dust that destroy sensitive electronics.
| Component | Indicator of Wear | Solution |
|---|---|---|
| Capacitor | Bulging or Leaking | Immediate Replacement |
| Bus Bar | Blue/Black Tarnish | Clean and Tighten |
| Wiring | Brittle Insulation | Re-wire/Insulate |
Does the cooling system impact stud welding machine maintenance?
The cooling system is a critical focus for stud welding machine maintenance to prevent thermal shutdown. You must ensure that the fans are spinning at full speed and that the intake filters are not clogged with site grime. Overheating is the primary cause of shortened lifespans for high-voltage transformers.
Ensuring proper airflow
- Clear debris from intake grills.
- Verify fan blades rotate freely.
- Position the unit in a well-ventilated area.
Believe it or not. A well-ventilated machine can handle higher duty cycles without stressing the internal power modules. Always keep the welder off the floor on a pallet to avoid sucking up floor-level dust.
Key Takeaway: Optimized airflow keeps internal temperatures stable, allowing for continuous operation on demanding projects.
| Factor | Ideal Condition | Risk |
|---|---|---|
| Fan Speed | Maximum RPM | Thermal Shutdown |
| Filter | Clean/Debris-free | Component Fatigue |
| Location | Elevated/Dry | Dust Ingestion |
How to inspect cables during stud welding machine maintenance?
Frequent lead inspections are a vital part of stud welding machine maintenance to prevent power loss. You should run your hands along the length of the cables to feel for any internal breaks or heat-damaged insulation. Damaged leads are not only inefficient but also present a significant safety hazard.
Checking for insulation wear
- Look for exposed copper wiring.
- Check for fraying at connector points.
- Inspect ground clamps for rust.
Here is the kicker. A weak ground connection is the most common hidden cause of poor weld penetration and erratic arc behavior. Solid electrical connections are the foundation of every high-quality weld you perform.
Key Takeaway: Properly maintained cables ensure the full power of your machine reaches the weld zone every time.
| Cable Issue | Visual Sign | Required Action |
|---|---|---|
| Fraying | Bare Wire | Replace Cable |
| Oxidation | Green/Black Tips | Trim and Recut |
| Loose Plug | Heat at Terminal | Re-tighten Socket |
What storage tips improve stud welding machine maintenance?
Correct storage serves as a passive form of stud welding machine maintenance that protects your gear from corrosion. You must store your equipment in a dry, temperature-controlled environment to shield delicate circuit boards from humidity. Using a breathable cover keeps site dust away from the machine’s cooling system.
Preventing environmental corrosion
- Use a dedicated dry storage area.
- Keep machines off the cold floor.
- Apply protective breathable covers.
That is just the beginning. Humidity causes oxidation on control boards, which leads to intermittent logic errors that are difficult to diagnose. Treating your storage area as a clean zone extends your service intervals significantly.
Key Takeaway: Protecting your machine from the environment during downtime ensures it is always ready for the next job.
| Storage Factor | Ideal Status | Potential Problem |
|---|---|---|
| Humidity | Below 50% | Circuit Oxidation |
| Temperature | Stable/Mild | Solder Fatigue |
| Surface | Pallet/Rack | Moisture Ingress |
Can automation simplify your stud welding machine maintenance?
Integrating automated systems simplifies long-term stud welding machine maintenance by standardizing stud quality. When studs are prepared with automated precision, the welding machine experiences less stress from inconsistent fluxing. This reduction in spatter means you spend less time cleaning your equipment.
Standardizing stud quality
- Ensures 100% flux presence.
- Reduces weld spatter and smoke.
- Standardizes the welding cycle.
Look at this. High-quality, automatically prepared studs reduce the carbon buildup on your gun’s chuck and footpiece. Automation at the preparation stage acts as a preventative measure for your entire welding system.
Key Takeaway: Automation reduces the “collateral damage” caused by poor stud quality, keeping your machine cleaner.
| Process Type | Spatter Level | Cleaning Frequency |
|---|---|---|
| Manual Fluxing | High/Variable | Weekly Deep Clean |
| Automated Fluxing | Low/Consistent | Monthly Inspection |
| No Fluxing | Extreme/Fail | Daily Repair |
What safety gear is needed for stud welding machine maintenance?
Safety must never be compromised during stud welding machine maintenance tasks. You should always follow strict lockout-tagout procedures to ensure the machine cannot be energized while you are working on it. Wearing the correct Personal Protective Equipment (PPE) protects you from sharp edges and metallic dust.
Using lockout-tagout procedures
- Disconnect the main power plug.
- Apply physical locks to switches.
- Attach clear warning tags.
But wait, there is more. Always wait at least five minutes after unplugging the unit to allow internal capacitors to discharge their stored energy. A safe maintenance culture leads to a more professional and accident-free workplace.
Key Takeaway: Prioritizing safety protects your most valuable assets while preventing accidental equipment damage.
| PPE Item | Purpose | Phase |
|---|---|---|
| Insulated Gloves | Electrical Shock | Inspection |
| Safety Goggles | Eye Protection | Dust Blow-out |
| Ear Protection | Hearing Safety | Air Purge |
How to calibrate gear for stud welding machine maintenance?
Software and hardware calibration is the final step in stud welding machine maintenance for high-precision work. You must verify that the digital display matches the actual output voltage at the gun terminals. Over time, electronic components can “drift,” leading to welds that are too hot or too cold.
Verifying voltage accuracy
- Use a calibrated multimeter.
- Check timing cycles periodically.
- Verify the duty cycle limits.
What does this mean for you? Calibration ensures repeatability, so every weld matches the validated procedure required by your structural engineers. Annual professional audits are recommended to maintain factory-standard performance.
Key Takeaway: Electrical audits ensure your machine delivers the exact power required for safety-critical welding joints.
| Test Type | Tool Needed | Frequency |
|---|---|---|
| Voltage Output | Multimeter | Quarterly |
| Timing Sync | Oscilloscope | Annually |
| Insulation | Megohmmeter | Bi-annually |
Investing time in these upkeep steps ensures your projects stay on track and your equipment lasts for decades. We have addressed the most common pain points of equipment failure by providing clear, actionable steps for your system. Our goal is to support your long-term success through precision engineering and expert guidance. For a consultation on the best industrial gear and customized care plans for your project, please contact us today.
FAQ
Can I use any lubricant on the internal parts of a stud welding gun?
No. You should only use manufacturer-recommended dry lubricants or non-conductive grease to avoid attracting metallic dust that can cause jams.
What’s the best way to clean the cooling vents effectively?
Utilizing dry, compressed air to blow from the inside out is the most effective method for removing trapped site grime.
How do I know if my ground cable needs to be replaced?
Check for heat at the connectors; if the cable feels unusually hot during normal operation, it has high internal resistance and is failing.
Can I perform maintenance while the machine is still plugged in?
Never. Always disconnect the power and wait for the capacitors to fully discharge before opening the housing or touching internal leads.
How often should I replace the welding gun chuck?
Replace the chuck as soon as you see visible erosion or if the stud no longer fits snugly, as a loose fit leads to destructive arcing.