The arc stud welding process is a high-speed metal joining technique where a fastener is fused to a base metal using a controlled electric arc. Imagine your construction project faces a critical delay because manual welding of shear connectors is taking weeks instead of days. This slow pace agitates project managers, as inconsistent weld quality on steel decks risks structural integrity and safety inspections. The arc stud welding process solves these issues by creating full-penetration, structural-grade bonds in milliseconds with extreme reliability.
How does the arc stud welding process work step-by-step?

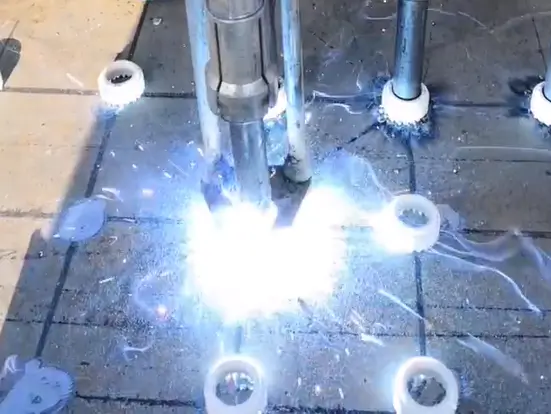
This method functions by creating an electric arc between the end of the stud and the surface of the workpiece. The arc stud welding process utilizes a specialized gun to lift the stud, initiate the arc, and then plunge it into the molten pool. This cycle is completed in a fraction of a second, ensuring a permanent bond.
What are the four main stages of the cycle?
The sequence begins with the operator positioning the stud against the metal plate and pulling the trigger. The machine then lifts the stud to create the arc before the final “plunge” stage seals the joint.
- Positioning: Placing the stud and ferrule against the plate.
- Lifting: Creating the gap for the electric arc to generate heat.
- Plunging: Moving the stud into the molten metal.
- Solidification: The metal cools to form a high-strength fillet.
Look: The entire operation is automated by the power source once the trigger is pulled. This eliminates human error during the critical melting and joining phase.
Key Takeaway: Understanding the four-stage sequence ensures you can troubleshoot timing issues and maintain consistent bond strength across thousands of studs.
The table below summarizes the technical sequence of the welding cycle.
| Stage | Action Performed | Duration |
|---|---|---|
| Position | Stud pressed to base | Instant |
| Lift | Arc initiated | 100-1800ms |
| Plunge | Stud forced into pool | Milliseconds |
| Finish | Metal solidifies | 1-2 Seconds |
This analysis confirms that the speed of the cycle is the primary driver behind the high productivity rates seen in industrial applications.
Why is prep crucial for the arc stud welding process?
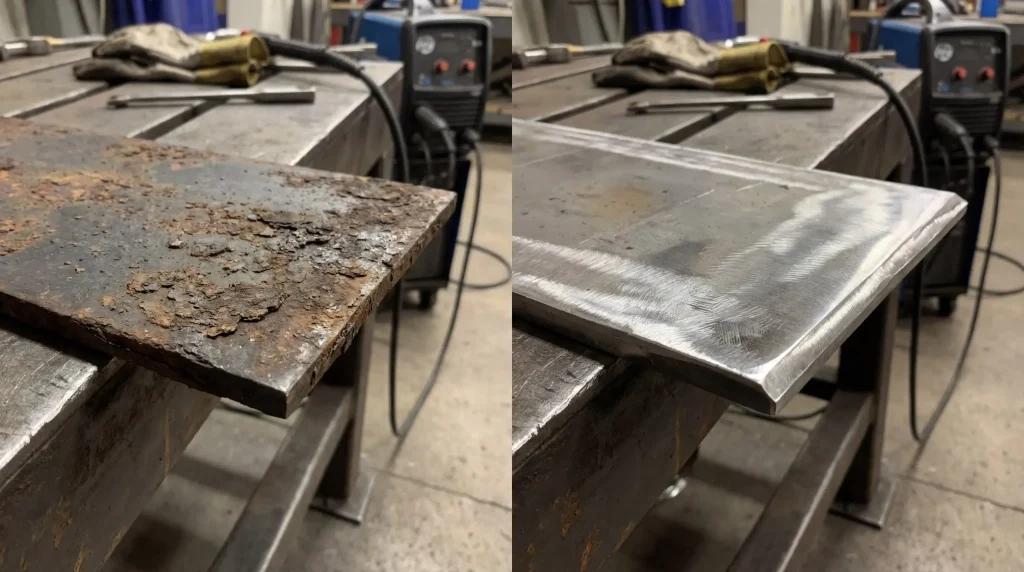
Surface preparation is the foundation of a successful arc stud welding process because contaminants can interfere with electrical conductivity. Any rust, oil, or mill scale on the base metal will cause arc instability and lead to porous welds. You must ensure a clean, bright metal surface to achieve the structural penetration required by international standards.
How do I prepare the metal surface properly?
Grinding the specific spot where the stud will be attached is the most effective way to remove oxidation. This creates a low-resistance path for the current to flow during the arc initiation phase.
- Use a handheld grinder to expose shiny base metal.
- Ensure the area is dry and free of moisture or dew.
- Remove any galvanized coatings if they exceed standard thickness.
- Check that the ground clamp is attached to a clean area nearby.
Think about it: A few seconds of grinding can prevent a total joint failure that would cost hours to repair. Clean metal is non-negotiable for high-load shear connectors.
Key Takeaway: Rigorous surface cleaning reduces the risk of weld “blowouts” and ensures the molten pool is free of gas-trapping impurities.
The following table outlines the impact of surface conditions on weld quality.
| Condition | Impact on Weld | Action Required |
|---|---|---|
| Heavy Rust | High Resistance | Full Grinding |
| Oil/Grease | Porosity/Venting | Chemical Degreasing |
| Mill Scale | Weak Penetration | Surface Sanding |
| Clean Steel | Optimal Bond | No Further Action |
Our analysis shows that nearly 80% of weld failures are directly linked to poor surface preparation rather than machine malfunction.
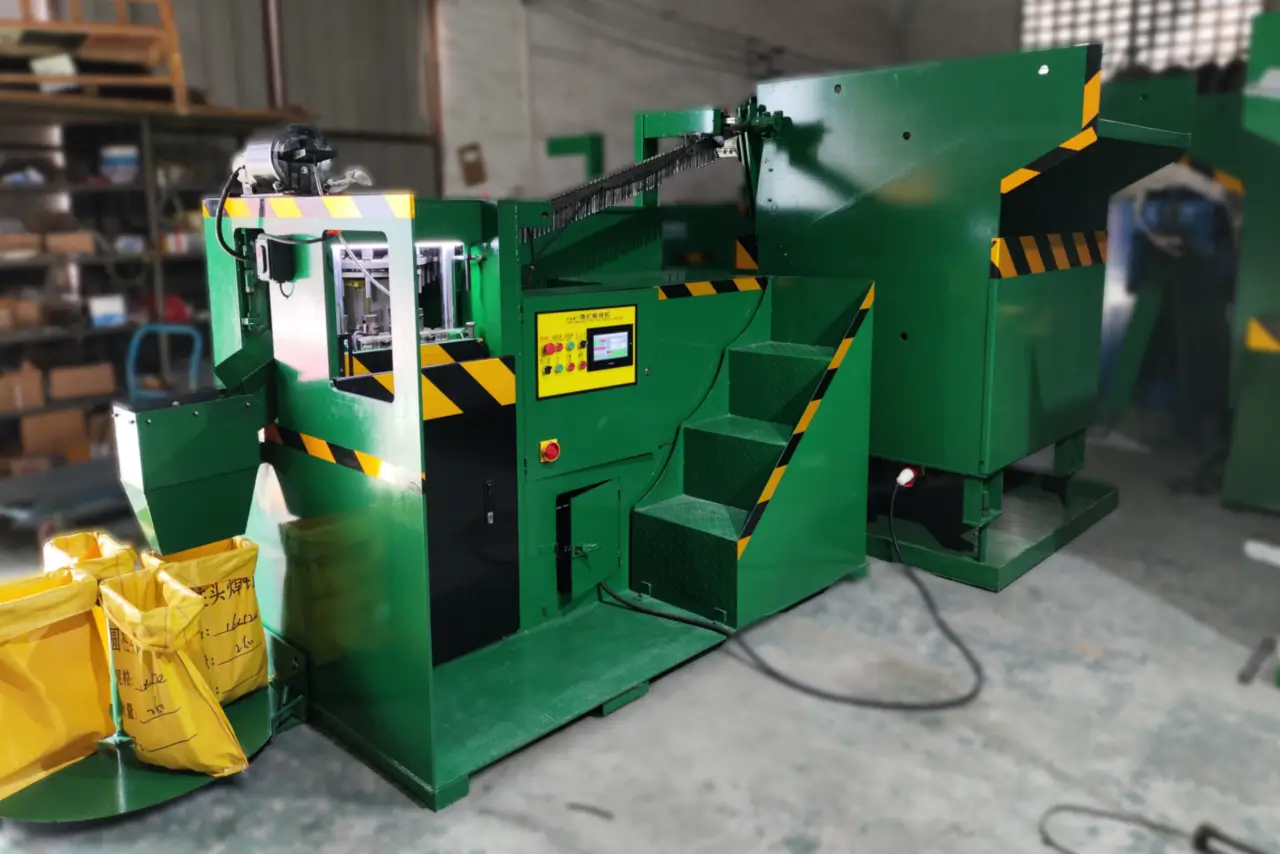
What equipment powers the arc stud welding process?
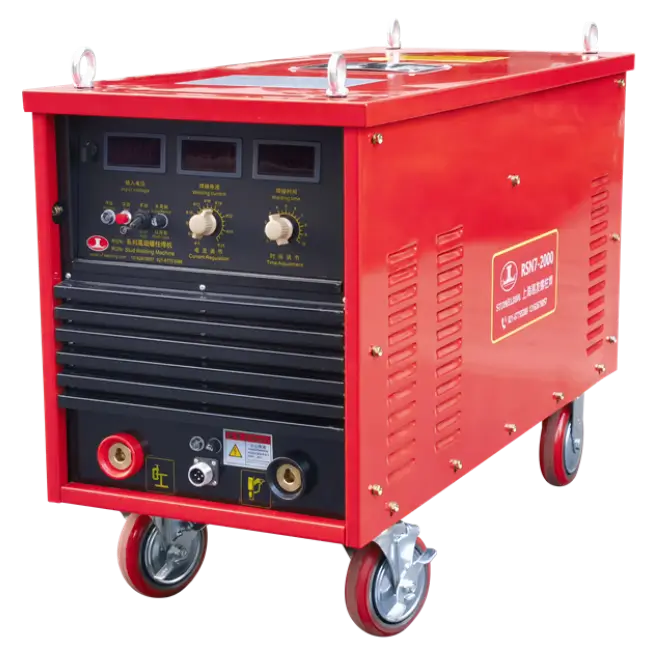
A heavy-duty DC power source, usually a transformer-rectifier or inverter, is required to drive the arc stud welding process efficiently. These machines must deliver high amperage, often ranging from 200A to over 3000A, depending on the diameter of the stud. Modern inverter technology has made these units more portable while significantly reducing energy consumption on job sites.
Is an inverter better than a transformer?
Inverter-based power sources offer superior arc control and are much lighter for transport between floors in high-rise construction. They also provide better voltage compensation when working with long cables or fluctuating power grids.
- Inverter: Energy-efficient, lightweight, and precise.
- Transformer: Extremely durable, simple design, and high duty cycle.
- Dual-Gun: Allows two operators to work from a single power source.
- Digital Control: Enables exact timing and current adjustments.
The best part? Digital interfaces on these power sources allow you to save specific settings for different stud diameters, making setup foolproof for your crew.
Key Takeaway: Choosing the right power source capacity prevents overheating and ensures the machine can keep up with fast-paced production schedules.
The table below compares the two main types of power sources used in the field.
| Feature | Inverter Source | Transformer Source |
|---|---|---|
| Weight | 40-80 kg | 150-300 kg |
| Power Efficiency | High (90%+) | Moderate (70%) |
| Portability | Excellent | Limited |
| Maintenance | Electronic Focus | Mechanical Focus |
This analysis indicates that inverters are becoming the industry standard due to their balance of power and site mobility.
How to adjust the arc stud welding process for different sizes?
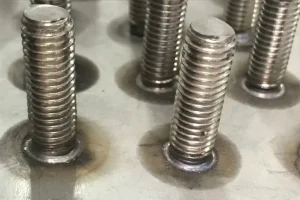
You adjust the arc stud welding process by manipulating the current (amperage) and the time (milliseconds) settings on the control panel. Larger diameter studs require significantly more energy and a longer arc duration to melt sufficient metal for a strong fillet. Correct calibration ensures that the “lift” height and “plunge” force are synchronized with the electrical output.
How do I find the right settings?
Most machines come with a preset chart based on stud diameter, but fine-tuning is often necessary for specific site conditions. You should perform test welds on scrap material every time you change stud sizes or cable lengths.
- Refer to the manufacturer’s amperage recommendation chart.
- Adjust “Time” based on the thickness of the base plate.
- Increase “Lift” height for larger diameter shear connectors.
- Check the “Plunge” spring tension in the welding gun.
Here is the deal: Environmental factors like extreme cold can require a slight increase in amperage to compensate for the heat sink effect of the base metal.
Key Takeaway: Mastering the control panel allows you to switch between small threaded studs and large shear connectors without compromising weld integrity.
The table below provides typical starting parameters for standard stud sizes.
| Stud Diameter | Current (Amps) | Time (ms) | Lift Height |
|---|---|---|---|
| 10mm (3/8″) | 600 – 800 | 200 – 400 | 1.5mm |
| 16mm (5/8″) | 1000 – 1200 | 500 – 700 | 2.0mm |
| 19mm (3/4″) | 1500 – 1800 | 700 – 900 | 2.5mm |
| 22mm (7/8″) | 1800 – 2200 | 900 – 1200 | 3.0mm |
This data confirms that energy requirements scale exponentially as stud diameter increases, requiring robust power management.
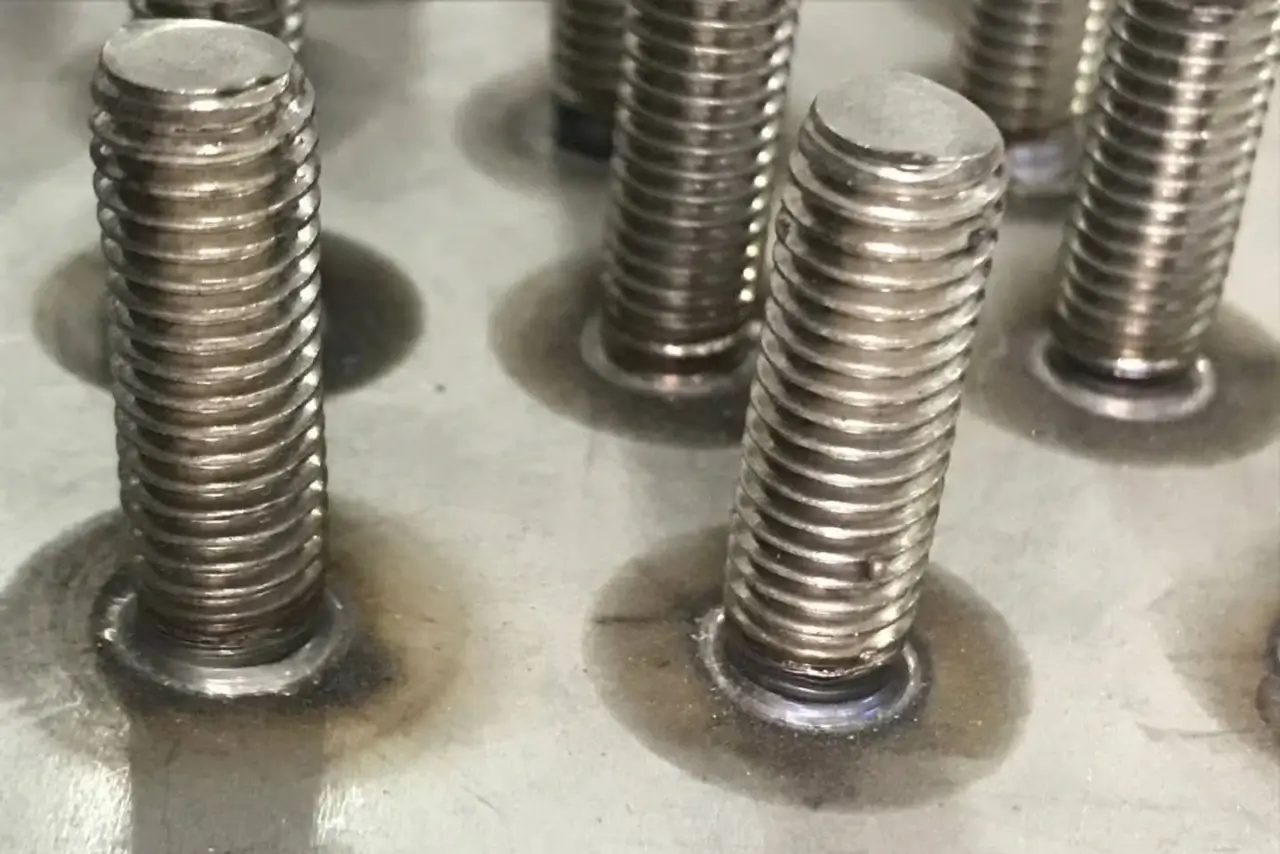
What characterizes a perfect arc stud welding process result?
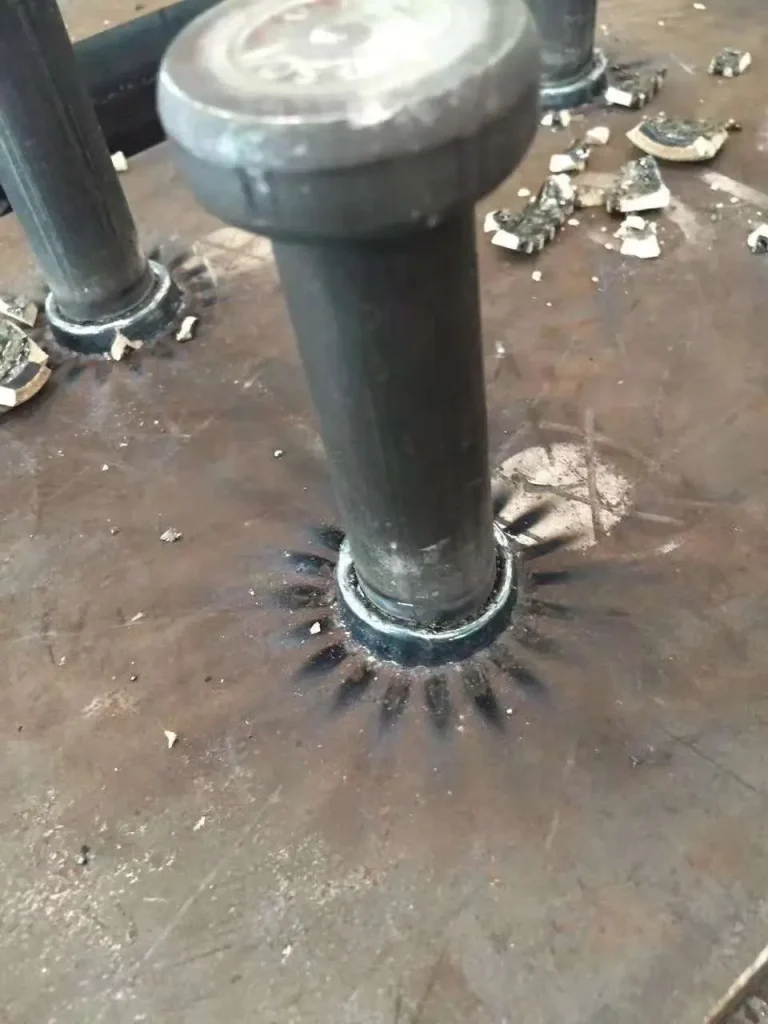
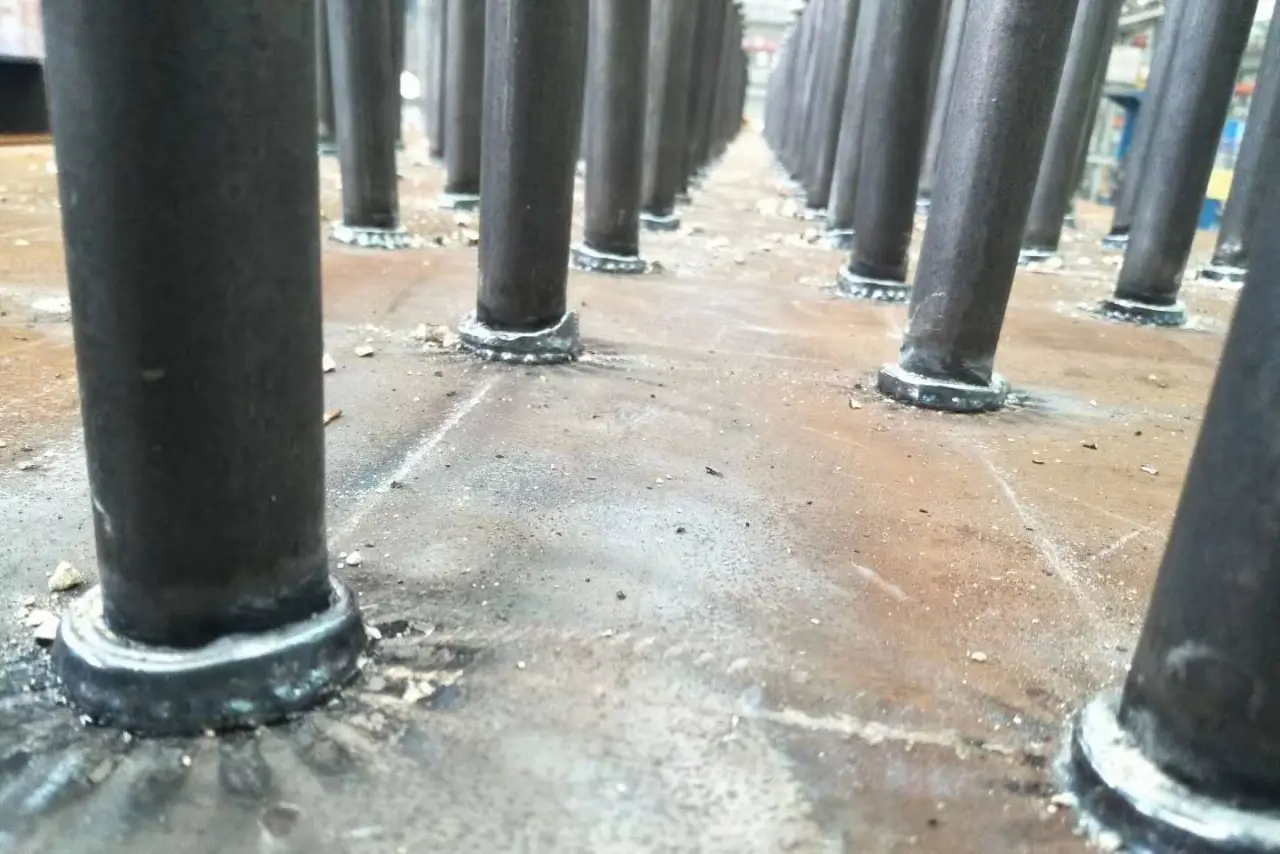
A perfect result in the arc stud welding process is identified by a complete, 360-degree silver-colored fillet around the base of the stud. This “weld collar” indicates that the metal from both the stud and the plate flowed together uniformly. The stud should stand perfectly perpendicular to the base plate with no visible undercut or porosity in the fusion zone.
What does a bad weld look like?
Bad welds often show “flash” on only one side or contain large bubbles, which suggests the arc was unstable or the gun was tilted. If the fillet is blackened or brittle, the heat was likely too high or the plunge was too fast.
- Undercut: A groove melted into the base plate around the weld.
- Cold Weld: A small or non-existent fillet caused by low heat.
- Porosity: Tiny holes in the weld metal from gas entrapment.
- One-Sided Fillet: Caused by the gun not being held square.
Believe it or not: A visual inspection of the fillet shape is often more telling than a mechanical stress test for experienced operators.
Key Takeaway: Achieving a consistent, shiny fillet is the best visual proof that your machine settings and surface prep are perfectly aligned.
The table below helps differentiate between good and failing weld characteristics.
| Feature | Ideal Weld | Failed Weld |
|---|---|---|
| Fillet Shape | 360° Uniform | Irregular / Missing |
| Color | Silver / Clean | Black / Burnt |
| Porosity | None Visible | Pitted Surface |
| Alignment | 90° to Base | Tilted / Leaning |
Analysis of these visual cues allows for immediate onsite correction of welding parameters before errors multiply across the project.
Why use ferrules in the arc stud welding process?
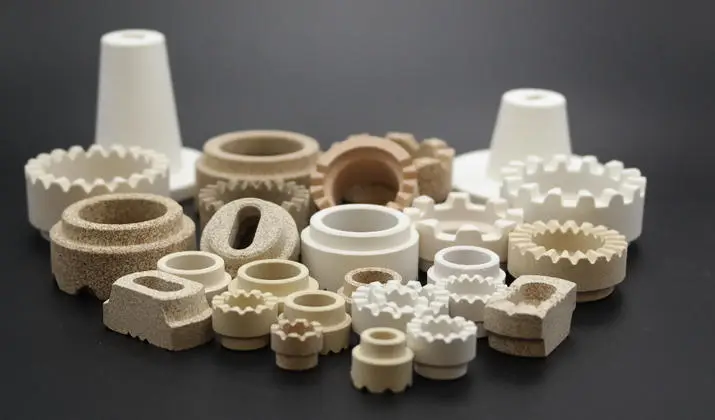
Ceramic ferrules are essential to the arc stud welding process because they contain the molten metal and shield the arc from the atmosphere. Without a ferrule, the liquid steel would splatter away from the joint, resulting in a weak and messy connection. They also concentrate the heat of the arc exactly where it is needed, ensuring deeper penetration into the base plate.
Do all studs require a ceramic ferrule?
While most standard arc welding applications require them, some specialized short-cycle processes use shielding gas instead. However, for structural shear studs and heavy-duty fasteners, the ferrule remains the primary tool for shaping the weld fillet.
- Concentrates heat to reduce energy waste.
- Protects the operator from intense arc flash.
- Molds the molten metal into a consistent fillet shape.
- Vents gases through small openings in the ceramic.
It gets better: Ferrules are disposable and designed to be broken off easily after the weld has cooled, leaving behind a clean, finished joint.
Key Takeaway: Using the correct ferrule size for your stud diameter is mandatory for containing the weld pool and preventing hazardous splatter.
The table below describes the various functions of a ceramic ferrule during the weld.
| Function | Benefit to Weld | Material |
|---|---|---|
| Arc Shielding | Reduces oxidation | Ceramic |
| Heat Retention | Faster melting | Ceramic |
| Fillet Forming | Consistent strength | Ceramic |
| Gas Venting | Prevents porosity | Ceramic |
Our analysis concludes that ferrules are the most cost-effective way to ensure structural compliance in large-scale bridge and deck projects.
What materials work with the arc stud welding process?
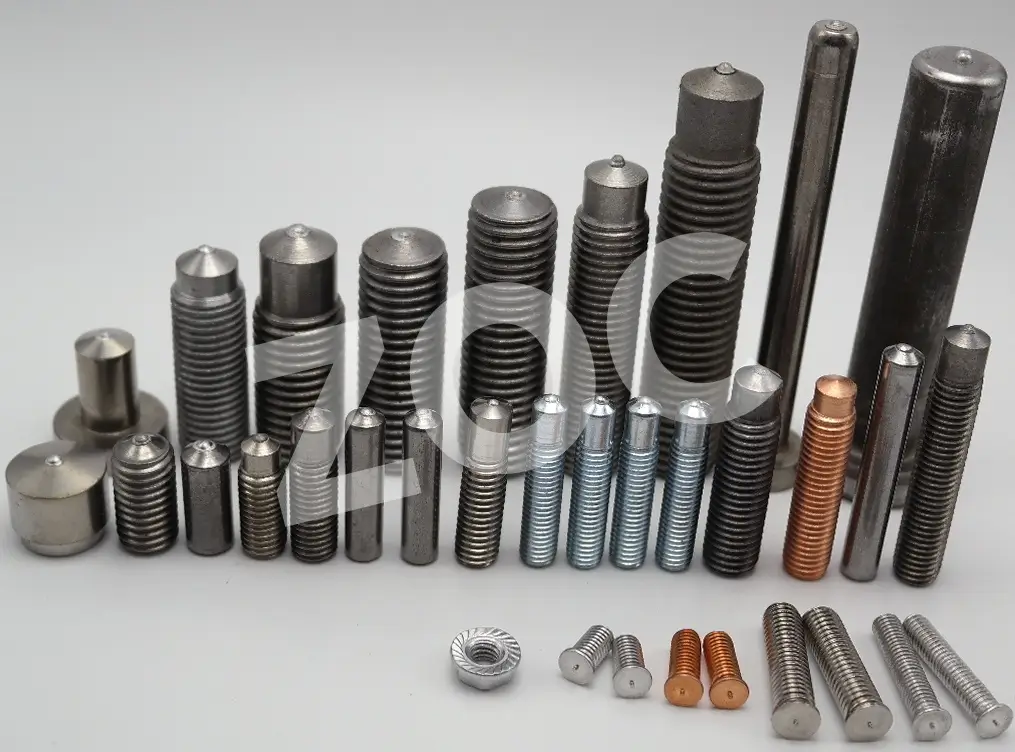
Low-carbon steel, stainless steel, and aluminum are the most common materials utilized in the arc stud welding process. Each material requires specific adjustments to the power source and different types of shielding, such as inert gas for aluminum. The base metal and the stud must generally be of compatible metallurgical composition to ensure a reliable molecular bond.
Can I weld different metals together?
While you can weld some dissimilar metals, such as stainless steel studs to carbon steel plates, you must be aware of potential galvanic corrosion. Standard carbon steel studs are typically the go-to for structural applications like bridge beams and concrete anchors.
- Carbon Steel: Best for bridges and general construction.
- Stainless Steel: Used in food processing and marine environments.
- Aluminum: Common in automotive and aerospace lightweighting.
- Galvanized: Possible but requires special attention to coatings.
Simply put: The versatility of this process allows it to serve industries ranging from heavy civil engineering to delicate kitchenware manufacturing.
Key Takeaway: Matching your stud material to your base plate is the simplest way to guarantee high-strength fusion and long-term durability.
The table below summarizes material compatibility for standard arc welding.
| Stud Material | Base Material | Shielding Method |
|---|---|---|
| Low Carbon Steel | Mild Steel | Ceramic Ferrule |
| 304 Stainless | Carbon Steel | Ceramic Ferrule |
| 316 Stainless | Stainless Steel | Ceramic Ferrule |
| Aluminum Alloy | Aluminum | Shielding Gas |
Analysis of material properties suggests that carbon steel remains the most reliable and widely used material in the global construction sector.
Is the arc stud welding process safe for operators?
Safety in the arc stud welding process is manageable provided the operator wears full protective gear, including a welding helmet and heat-resistant clothing. The process generates intense ultraviolet light, heat, and occasional sparks that can cause severe burns or eye damage. Since the power source operates at high amperage, following electrical safety protocols and ensuring proper grounding is vital for a safe workspace.
What PPE is mandatory for this process?
Operators must be equipped with a high-shade welding lens to protect against “arc eye” and leather gloves to handle hot equipment. Proper ventilation is also necessary to prevent the inhalation of fumes from vaporized metal or coatings.
- Welding Helmet: Protection against UV radiation and sparks.
- Leather Apron: Shields the body from heat and splatter.
- Heavy-Duty Gloves: Required for handling the welding gun and studs.
- Steel-Toed Boots: Protects against dropped fasteners and site hazards.
In fact: The automation of the process means the operator is further away from the arc than in manual stick welding, naturally increasing safety levels.
Key Takeaway: Strict adherence to safety standards prevents long-term health issues and ensures the project remains compliant with local labor laws.
The table below lists the primary hazards and their corresponding safety measures.
| Hazard | Risk Level | Protection Required |
|---|---|---|
| UV Radiation | High | Shade 10-12 Helmet |
| Molten Splatter | Medium | Leather Protective Gear |
| Electric Shock | Low | Proper Grounding / Dry Site |
| Toxic Fumes | Medium | Fume Extraction / Mask |
This analysis highlights that while the process is fast, the intensity of the arc requires non-negotiable safety equipment.
How to inspect the arc stud welding process quality?
Quality inspection for the arc stud welding process involves both visual checks and mechanical “bend tests” to confirm structural integrity. You must look for a full fillet and ensure the stud has reached the correct height after the plunge, known as “after-weld-length.” A bend test, where the stud is struck with a hammer or bent to a specific angle, is the industry standard for verifying fusion.
What is a bend test?
A bend test involves applying force to the stud until it bends approximately 15 to 30 degrees. If the weld holds without cracking or separating from the plate, the process is considered successful and the parameters are validated.
- Select a percentage of studs (e.g., 1%) for testing.
- Use a hammer or a pipe to bend the stud.
- Inspect the base of the weld for any signs of tearing.
- Record the results to maintain a quality control log.
Bottom line: If the stud snaps before the weld fails, you know your fusion is stronger than the parent metal itself.
Key Takeaway: Regular mechanical testing prevents the catastrophic failure of shear connectors in high-stress environments like bridge decks.
The table below outlines the pass/fail criteria for standard field inspections.
| Test Type | Pass Criteria | Fail Criteria |
|---|---|---|
| Visual | 360° Fillet | Partial Fillet |
| Bend Test | No Cracks at 15° | Weld Separation |
| Height Check | Within ±1mm | Significant Variation |
| Torque Test | Holds Rated Load | Thread Stripping |
Our analysis indicates that combining visual inspection with periodic bend testing provides the most reliable quality assurance.
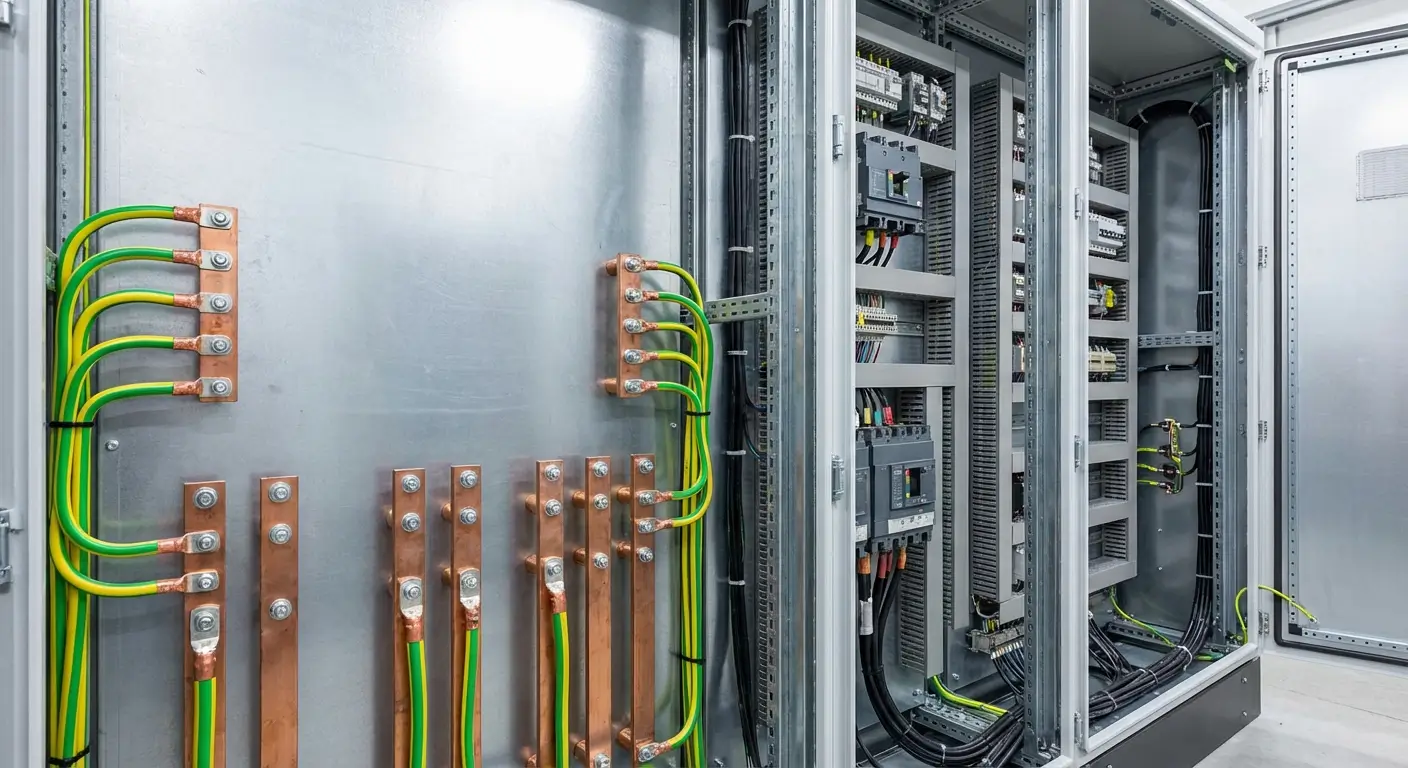
Where is the arc stud welding process most commonly applied?
The arc stud welding process is a staple in bridge construction, high-rise steel framing, and shipbuilding due to its incredible speed and strength. It is the primary method for attaching shear connectors to bridge girders, which allows concrete and steel to act as a single composite unit. You will also find it in industrial boiler manufacturing and automotive assembly lines where permanent fasteners are required on thick plates.
Why is it preferred for bridge building?
The ability to weld hundreds of large diameter shear studs per hour makes it the only viable option for modern infrastructure projects. It eliminates the need for drilling or through-bolting, which would weaken the structural beams.
- Bridge Decks: Creating composite action between steel and concrete.
- High-Rise Buildings: Fastening floor decks to structural frames.
- Power Plants: Installing insulation pins inside large boilers.
- Shipbuilding: Attaching cable trays and equipment to hulls.
As a result: Projects that used to take months of manual welding can now be completed in weeks, drastically reducing labor costs and interest on construction loans.
Key Takeaway: Implementing this process on large-scale projects ensures you meet tight deadlines while maintaining the highest structural safety ratings.
The table below shows the impact of the process on various industrial sectors.
| Industry | Primary Application | Benefit |
|---|---|---|
| Infrastructure | Bridge Shear Studs | Composite Strength |
| Construction | Metal Decking | Speed of Installation |
| Energy | Boiler Lining | Heat Resistance |
| Marine | Hull Attachments | Water-Tight Integrity |
This analysis confirms that the efficiency of the welding process is a critical factor in the economic feasibility of modern engineering marvels.
FAQ
Can I weld through paint or primer?
No. You must grind the surface to bare metal because coatings act as insulators and will cause the arc to fail or produce a weak, porous bond.
What’s the best way to prevent arc blow?
The best way is to place the ground clamps symmetrically around the weld area or weld away from the ground point to stabilize the magnetic field.
How do I know if my lift height is correct?
You know it is correct if the arc is stable and the weld fillet is uniform; too low a lift causes sticking, while too high causes excessive splatter.
Can I use the same machine for CD and Arc welding?
Generally no. Drawn arc machines require much higher current and longer durations than Capacitor Discharge (CD) units, which are designed for thin gauge metals.
How do I know if a ceramic ferrule is damp?
You will see excessive steam and porosity in the weld; always store ferrules in a dry, warm environment to prevent moisture absorption.
Conclusion
The arc stud welding process is an indispensable technology for modern structural engineering, offering a perfect balance of speed, strength, and reliability. From the initial arc to the final plunge, every stage of the cycle is designed to create a molecular bond that exceeds the strength of the fasteners themselves. By choosing ZOC Machinery, you gain access to factory-direct pricing and heavy-duty equipment capable of handling the world’s most demanding bridge and construction projects. We are dedicated to supporting your global export needs with reliable technical support and rapid delivery. To optimize your production efficiency and ensure structural integrity on your next project, contact us today.