Stud welding machine maintenance starts with two different jobs: routine checks an operator can perform from outside the machine, and electrical service that belongs to trained personnel following the manufacturer’s instructions. A loose return clamp, worn gun chuck, or blocked cooling inlet can interrupt a shift. A damaged cable or stored electrical charge can also injure someone. Use a short pre-use checklist, record faults, and take defective equipment out of service before trying to compensate with welding settings.
Stud welding machine maintenance before each shift
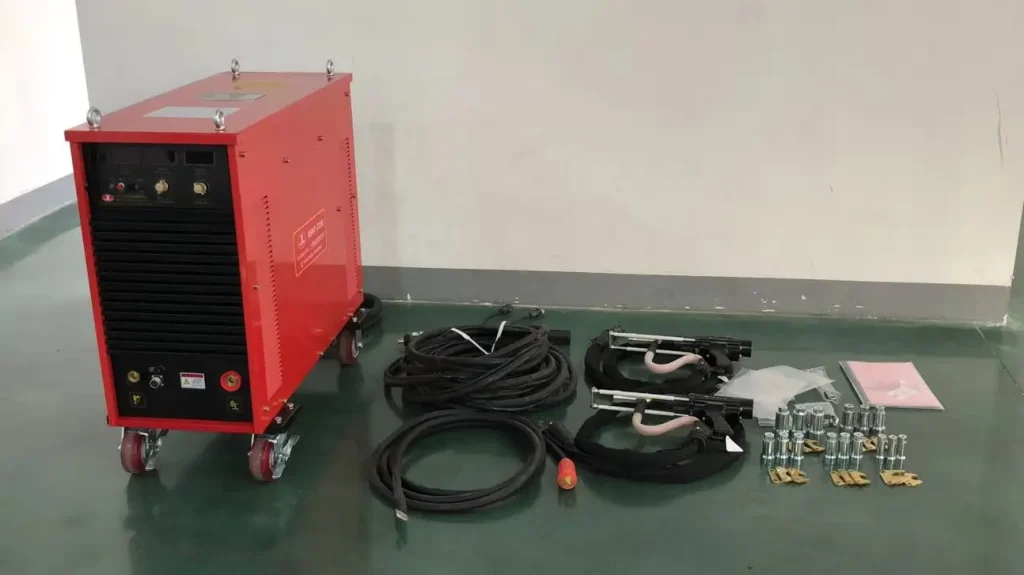
Before the first weld, inspect the visible condition of the power source, gun, cables, connectors, return clamp, and cooling openings. Confirm that the machine program, stud, consumables, and available supply match the job. The exact inspection interval should follow the equipment manual and site plan, with an extra check after transport or a setup change.
A practical pre-use sequence
- Look for cut insulation, crushed leads, loose plugs, or signs of overheating.
- Check that the return clamp has a secure, approved connection to the workpiece.
- Confirm the chuck grips the stud and that gun movement is not sticking.
- Keep cooling openings clear and make the trial welds required by the procedure.
If the arc becomes erratic, stop and diagnose the fault rather than increasing current. Our stud welding troubleshooting guide covers the symptoms.
| When | Operator check | If a problem is found |
|---|---|---|
| Before use | Visual check of leads, gun, clamp, and vents | Remove from service or correct per manual |
| After a move | Check connectors and setup | Repeat required trial weld |
| After a fault | Record code and condition | Refer for diagnosis before restarting |
Clean the exterior without pushing dust inside
Metal dust can settle around air inlets and on the case. Clean the exterior with the machine isolated and a method approved by its maker. Do not direct high-pressure air through vents or onto circuit boards unless the service instructions specifically call for it; air can drive conductive debris deeper into the unit. Internal cleaning is a service task, not a general operator shortcut.
Keep the cleaning method matched to the surface
A dry cloth may suit the case and display. A brush or vacuum intended for the equipment may suit accessible external openings. Avoid liquid cleaners entering connectors or ventilation paths. Inspect filters only if the model has serviceable filters and the manual explains how to remove them.
| Area | Routine approach | Avoid |
|---|---|---|
| Case and display | Wipe per manufacturer instructions | Liquid entering controls |
| External vents | Remove visible obstruction safely | Blowing dust into the case |
| Internal electronics | Qualified service under procedure | Operator brushing live parts |
Maintain the stud welding gun
The stud welding gun holds the stud and controls its lift and plunge. Spatter, a worn chuck, loose holder, or damaged cable can change the cycle even when the power source display is unchanged. Inspect the gun unloaded and de-energized as its manual requires; replace worn front-end parts instead of forcing a poor fit.
Check contact and movement
- Confirm the chuck or stud holder matches the stud size.
- Remove accessible spatter using the approved tool and method.
- Check footpiece, ferrule holder, trigger, and moving parts for damage or sticking.
- Recheck lift and plunge settings after parts are changed.
The stud welding gun guide explains how the chuck and lift mechanism affect the weld cycle.
| Gun part | Symptom | Action |
|---|---|---|
| Chuck | Loose stud or poor contact | Clean or replace as specified |
| Lift mechanism | Sticking or variable movement | Inspect and service |
| Foot and ferrule holder | Tilt or poor seating | Check alignment and wear |
Leave internal electrical checks to qualified service
A power source can retain hazardous energy after the input is disconnected, particularly where capacitors are fitted. A fixed five-minute wait does not prove it is safe to open. Capacitors, bus bars, and internal wiring should be inspected or replaced only by personnel qualified for that model, using its isolation and discharge procedure and verifying the safe state before contact.
Report evidence; do not make a live repair
An operator can report fault codes, a burning smell, unusual noise, repeated thermal trips, or damaged external connectors. Those observations help service staff decide what to test. Do not tighten internal terminals, brush boards, or replace capacitors as an informal field repair.
| Observation | Operator response | Service response |
|---|---|---|
| Fault code or repeated trip | Stop and record the code | Diagnose to manual |
| Heat or burning smell | Isolate and remove from use | Inspect safely after energy control |
| Suspected internal damage | Do not open case | Qualified inspection and repair |
Protect the cooling path
Cooling performance depends on unobstructed inlets, working fans, ambient conditions, and the machine’s duty-cycle rating. Place the stud welding machine with the clearance required by its manual. Do not block vents with covers or stack equipment against them. A fan need not run at “maximum RPM” at all times; some machines control fan speed automatically.
Respond to a thermal warning
If the unit reports overtemperature, stop welding and follow the manual’s recovery sequence. Check external airflow and the workload against the rated duty cycle. Repeated trips after those checks warrant service rather than a workaround that bypasses protection.
For moving equipment between sites, the on-site stud welder selection guide covers transport and power planning.
| Cooling item | What to check | Action |
|---|---|---|
| Air inlet and outlet | External blockage | Clear per manual |
| Placement | Required clearance and dry location | Reposition safely |
| Duty cycle | Welding pace versus rating | Allow required recovery |
| Repeated thermal fault | Fan or internal problem | Refer for service |
Inspect welding and return cables
Look over the full accessible cable length before use, with power isolated. Cut insulation, crushed sections, exposed conductors, loose plugs, or discolored connectors are reasons to stop and inspect further. Do not run your hands along a potentially energized or damaged cable to feel for hidden breaks. Follow the machine maker’s instructions for cable size, length, and replacement.
Treat hot connectors as a fault
Unexpected connector heating can indicate poor contact or overload. Isolate the unit, let parts cool, and have the connection inspected. Trimming a cable end or tightening a terminal is appropriate only where the rated connector and service instructions allow it.
| Cable finding | Possible consequence | Response |
|---|---|---|
| Exposed conductor | Shock or short-circuit risk | Remove from service |
| Loose or hot connector | Heating and unstable output | Qualified repair |
| Damaged return clamp | Poor work connection | Replace or repair per manual |
Store the machine and consumables properly
Transport and storage can undo good maintenance. Keep the machine within the temperature and humidity range specified by its maker, protected from rain, condensation, impact, and dust. Let a unit moved from a cold location reach suitable operating conditions before energizing it if condensation may have formed. Store ferrules, studs, and accessories under their own supplier instructions.
Check after storage
Inspect plugs, leads, vents, and the gun before the first use. A universal humidity target such as “below 50%” is not meaningful for every model; the manual and site environment determine the control needed.
| Storage factor | What to control | Before reuse |
|---|---|---|
| Moisture and condensation | Dry protected storage | Inspect and allow safe acclimation |
| Impact and cable strain | Secure transport | Check case, plugs, and leads |
| Dust and consumables | Separate covered storage | Check vents and consumable condition |
Automation does not replace maintenance
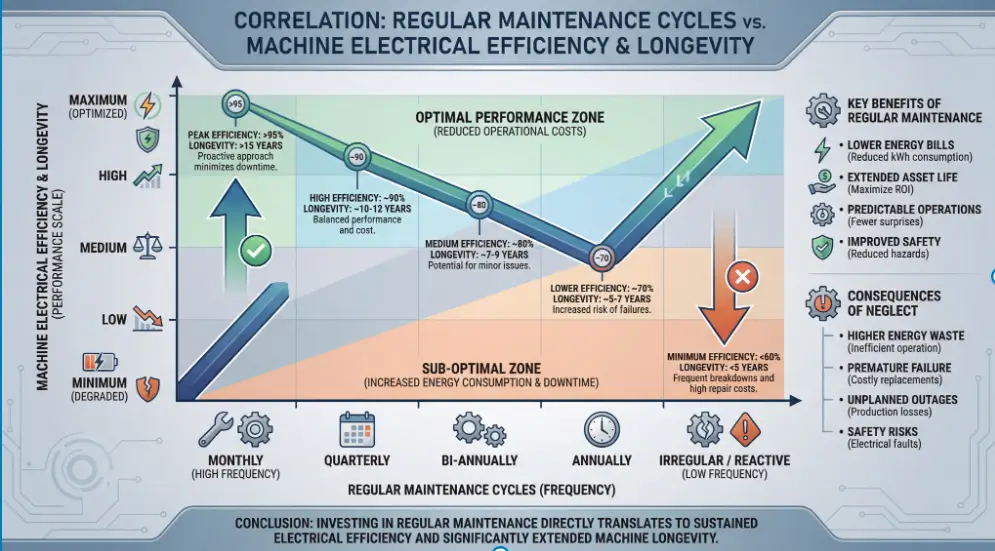
Consistent stud supply and automated feeding may reduce jams in a suitable production line, but they do not set the power source maintenance interval. Flux-ball preparation, ferrule fit, and stud geometry are production controls. Cooling, cables, gun movement, and electrical service still need their own checks.
Track the actual failure pattern
If a line starts jamming after a stud-batch change, inspect the studs and feeder before servicing the welder. The shear-stud flux fixing guide describes one upstream preparation step. Compare jam counts and weld-test results rather than assuming automation guarantees a fixed cleaning schedule.
| System area | Monitor | Maintenance decision |
|---|---|---|
| Stud supply | Dimensions and feed behavior | Inspect batch or feeder |
| Gun and chuck | Movement and wear | Service as needed |
| Power source | Faults, heat, and output checks | Follow manual and plan |
Control electrical hazards during maintenance
The first maintenance decision is who may do the work. External checks and approved cleaning can be assigned to trained operators. Opening the enclosure, measuring internal circuits, replacing capacitors, and testing stored energy require qualified personnel and the site energy-control procedure. Unplugging alone is not proof that internal parts are safe to touch.
Isolate, verify, then work
Apply the required lockout or tagout procedure, account for stored energy, and verify isolation before service. Use the personal protective equipment required for the task and site assessment. If testing needs the unit energized, follow a controlled service procedure rather than treating that as ordinary cleaning.
| Work type | Typical person | Required control |
|---|---|---|
| External visual check | Trained operator | Equipment in safe state |
| Accessible cleaning | Trained person per manual | Isolation and approved method |
| Internal electrical service | Qualified technician | Energy control and verification |
Verify performance after repair or calibration
Maintenance is complete when the equipment performs the approved welding cycle again. Use the manufacturer’s calibration instructions and intervals where calibration is required. A simple multimeter reading at the gun terminals is not a general substitute for a specified output test, and an arbitrary quarterly or annual schedule may not suit the model.
Keep a useful record
- Record the fault, part changed, service date, and person who completed the work.
- Record any required electrical or functional test under the manual.
- Restore the approved program and gun setup.
- Make and inspect trial welds before returning the unit to production.
The stud welding parameter guide explains what to recheck after a setup change. Our stud weld quality guide covers the acceptance side of that trial.
| After-service check | Purpose | Evidence |
|---|---|---|
| Electrical or functional test | Confirm repair under manual | Service record |
| Program and gun setup | Restore qualified settings | Setup sheet |
| Trial weld and inspection | Confirm production readiness | Test result |
If a fault repeats after these checks, contact us with the machine model, serial number, fault code, recent service history, and the stud and base-metal specification. Those details help separate an equipment fault from a welding-setup problem.
Frequently asked questions
Can I use any lubricant on the welding gun?
No. Use only the lubricant and application points specified by the gun maker. The wrong product can attract debris or affect electrical contact and movement.
Should I blow compressed air through the vents?
Follow the manual. High-pressure air can push conductive dust into sensitive parts. Clean accessible external surfaces by the approved method; leave internal cleaning to qualified service.
When should a return cable be replaced?
Replace or repair it when inspection finds exposed conductors, damaged insulation, a defective clamp, or a connector that cannot be restored to its rated condition. Do not continue welding with a hot or loose connection.
Can I open the machine once it is unplugged?
Only qualified service personnel should open it under the model-specific isolation and stored-energy procedure. There is no universal waiting time that proves a capacitor bank is safe.
How often should the gun chuck be replaced?
Replace it when it no longer holds the specified stud correctly or when wear exceeds the maker’s limit. Check fit during routine inspections and after unexplained arc or positioning faults.